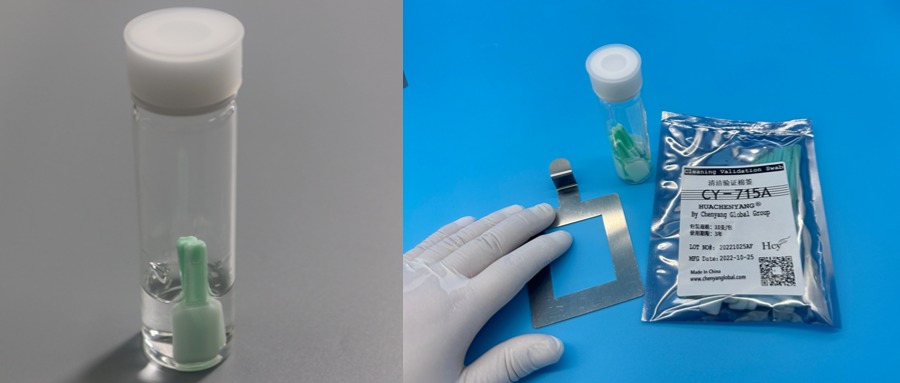
swab sampling procedure for cleaning validation
The swab sampling procedure for cleaning validation typically involves the following steps:
Preparation
- Sampling Equipment:
- Select appropriate swabs. There are different types available such as polyester-tipped swabs, which are often used as they have good absorbency and don’t shed fibers easily that could interfere with the analysis. The swab size should be suitable for the areas to be sampled (e.g., smaller swabs for narrow or hard-to-reach areas).
- Obtain clean and sterile sample containers. These are usually made of plastic or glass and should have proper lids to prevent contamination and leakage during transport to the laboratory.
- Have a calibrated measuring device like a pipette or a syringe ready if you need to add a diluent to the sample container later.

- Diluent Selection: Choose an appropriate diluent based on the nature of the residue you expect to sample and the analytical method that will be used. Common diluents include purified water, buffer solutions, or solvents like ethanol or methanol, depending on whether the residues are water-soluble or require an organic solvent for proper extraction.
- Personal Protective Equipment (PPE): Wear appropriate PPE, including gloves (usually latex or nitrile gloves that are clean and powder-free to avoid introducing contaminants), lab coats, and safety glasses if needed.
- Site Selection for Sampling
- Identify Critical Areas: Determine the areas that are most likely to retain residues after the cleaning process. These could include areas with complex geometries (such as corners, crevices, or joints in equipment), areas where product has direct contact during processing (like the inner walls of vessels, conveyor belts, or filling nozzles), and areas that are difficult to clean effectively.
- Map the Sampling Locations: Create a detailed diagram or list that clearly marks the specific locations where swab samples will be taken. This helps in ensuring consistency in sampling across different validation runs and also in accurately reporting the sample locations to the laboratory for analysis.
Swabbing Technique
- Wetting the Swab: If using a diluent, moisten the swab tip with an appropriate amount of the diluent. This helps in better collection of the residues. For example, if you expect protein-based residues and are using a buffer diluent, make sure the swab is evenly wetted but not dripping wet to avoid diluting the sample too much or losing sample during transport.
- Contact and Swabbing: Place the swab tip firmly against the surface to be sampled and use a systematic motion to swab the area. This could involve moving the swab in a back-and-forth or circular motion, covering the entire selected sampling area. For larger areas, you may need to divide the area into smaller sections and swab each section separately, ensuring complete coverage. Apply consistent pressure throughout the swabbing process to ensure uniform collection of residues.
- Edge and Crevice Sampling: When sampling edges, corners, or crevices, carefully insert the swab tip into these areas and gently rotate or move the swab to pick up any residues that might accumulate there. Be careful not to damage the swab or leave any part of the area unsampled.
Sample Collection and Storage
- Transfer to Sample Container: After swabbing, carefully place the swab into the sample container. If a diluent is used, make sure the swab is fully immersed in the diluent to allow for proper extraction of the residues from the swab tip into the solution.
- Labeling: Immediately label the sample container with clear and accurate information. This should include the sample ID (a unique identifier for each sample), the date and time of sampling, the location where the sample was taken (referring to the mapped sampling locations), the equipment or area being sampled, and the name of the person who took the sample.
- Storage Conditions: Store the samples under appropriate conditions until they are transported to the laboratory for analysis. This might involve keeping them at a specific temperature (e.g., refrigerated if the samples are prone to degradation or if the analytes are unstable at room temperature) and protected from light if necessary.
Transportation to the Laboratory
- Packaging: Package the samples securely to prevent breakage or leakage during transport. Use appropriate packaging materials like padded boxes or sealed plastic bags, depending on the type of sample containers.
- Chain of Custody: Maintain a proper chain of custody record that documents who has handled the samples from the time of collection until they reach the laboratory. This helps in ensuring the integrity and traceability of the samples and the results obtained from their analysis.
Laboratory Analysis
Sample Preparation (if needed): In the laboratory, the samples may need further preparation depending on the analytical technique. This could involve additional dilution, filtration, or extraction steps to get the sample in a suitable form for analysis.
Analytical Method Selection: Use an appropriate analytical method such as high-performance liquid chromatography (HPLC), gas chromatography (GC), or enzyme-linked immunosorbent assay (ELISA), depending on the nature of the residues being detected (e.g., chemical compounds, biological substances). The laboratory will then analyze the samples according to the validated analytical procedures and report the results, which are used to assess whether the cleaning process is effective in removing residues to acceptable levels.
Overall, following a strict and consistent swab sampling procedure is crucial for obtaining reliable data in cleaning validation to ensure that equipment is properly cleaned and product quality is maintained.
 A professional supplier of swabs
